Want to start coding using Automaduino? Great! Find out about the editor interface and what you need to do to generate code.
Overview

Arduino Editor Interface
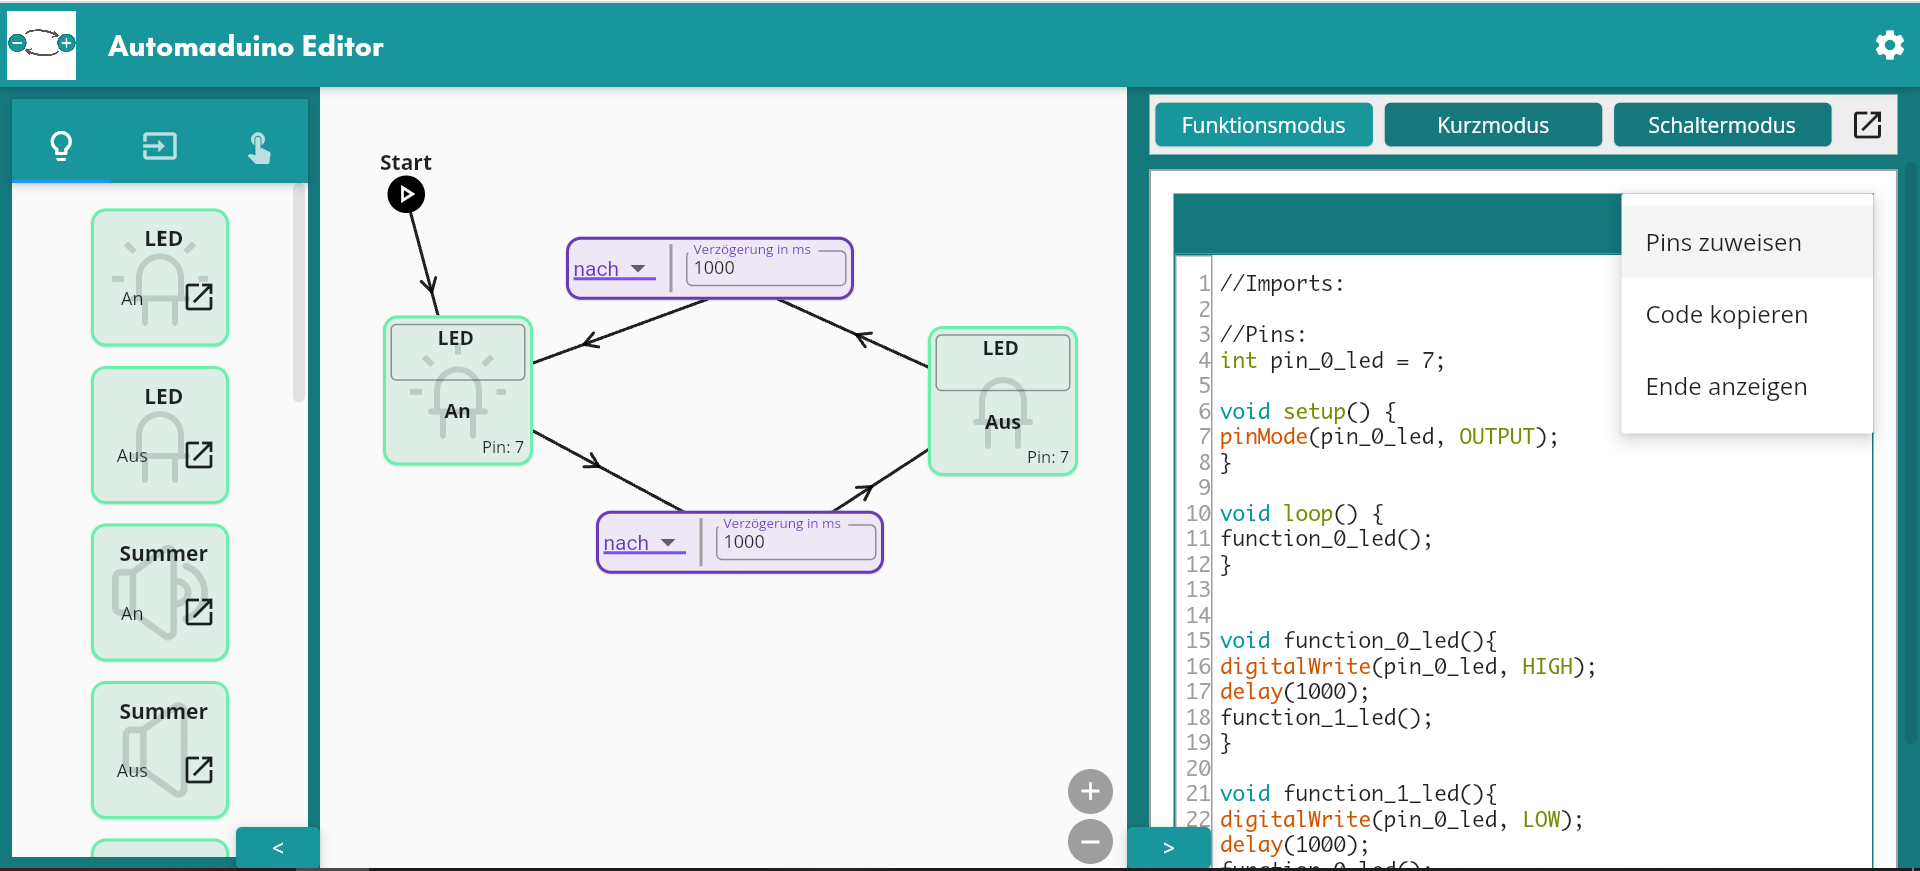
The interface consists of the following parts:
- Component Drawer
- This drawers consists of all component states you can use. To find out more about the components visit the Components Page.
- Start Point
- The Start Point is the entry for your program. You need to connect it to a state for the code to be able to run.
- State
- A state consists of component and a function. The state executes the function for its assigned component. Find out more about states here.
- Transition
- A transition connects two states and determines how and when to move from one state to the next. There are multiple different transition types. Find out more about transitions here.
- Pin Assignment
- This opens the Pin Assignment dialogue. This is necessary as the Arduino needs to know to which pin your component is connected. If there is a state on the canvas that does not have a pin assigned a warning is shown.
- Code
- Here the code for the Arduino is shown! The code is automatically generated if you add a state or connect two states. It also works as a text editor if you want to change the code.
- Code Style
- The code style menu allows you to select different code styles for the generator. This for advanced programmers. All Code Styles are explained in this section.
Pin Assignment
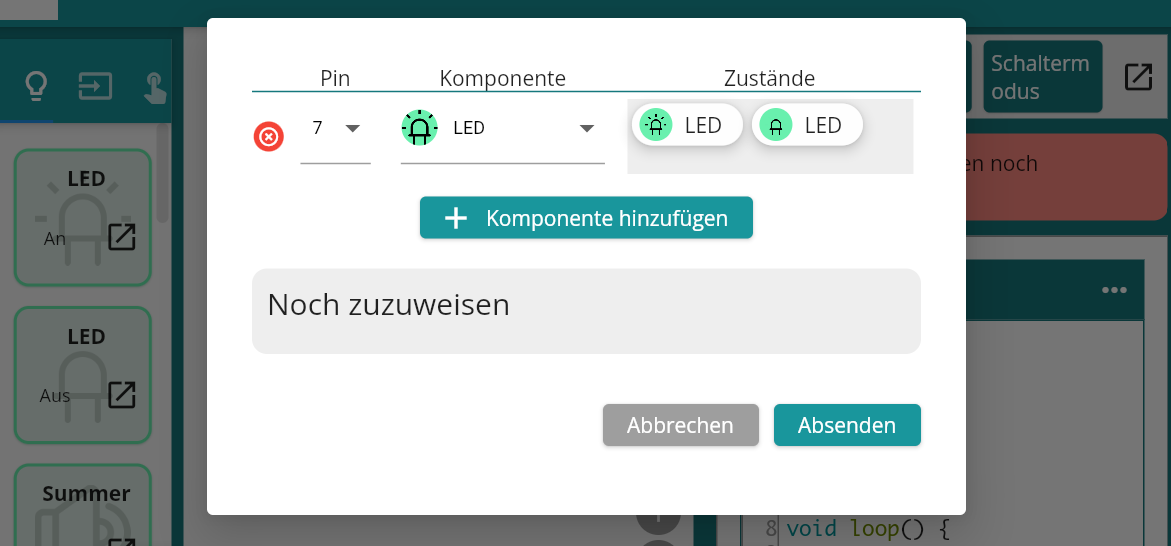
If you click on the pin assignment button a dialogue will open. Here you can assign the pins for the components on the board.
 Pin Assignment example
First add a new component, then select a pin number and a component type. If you have done this successfully you can drag a state from the list at the bottom and add it to the component.
If you’re done save your assignments by clicking on the submit button.
Tipp: You can rename your states so you know exactly which state you are assigning!
Copy Code
To use your code you have to copy it. You can always select all code in the editor by hand, but there is also a shortcut in the editor menu.
 Copy code using the editor shortcut
If your editor is closed there is a shortcut available at the bottom of the closed drawer. Next to it is also a shortcut to the pin assigment.

Copy code with a closed code editor
Arduino IDE
To upload a sketch to the Arduino you need to install the Arduino IDE.
If you’ve done this successfully, open the IDE and select your board type. The default one is “Arduino Uno”.
 Board selection Menu
Next connect your board via USB to your computer. Then select your board in the port selection. The correct port should have the board name next to it.
 Port Selection Menu
Then you can copy the code of the Automaduino editor and paste it into the Arduino editor. To upload a sketch press the upload button while your Arduino is connected. That’s it!
 Upload Button
For a full example head over to the blink page.
